
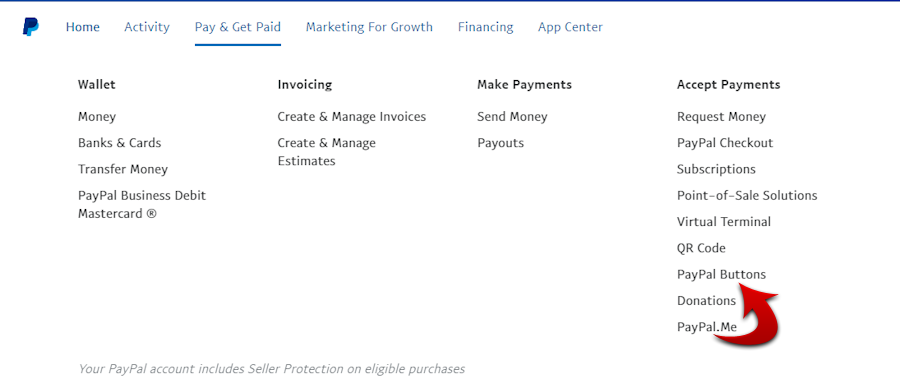
Login to your PayPal business account and select Pay and Get Paid from the top menu. Click on PayPal Buttons in the right-most column. (see red arrow in image below)
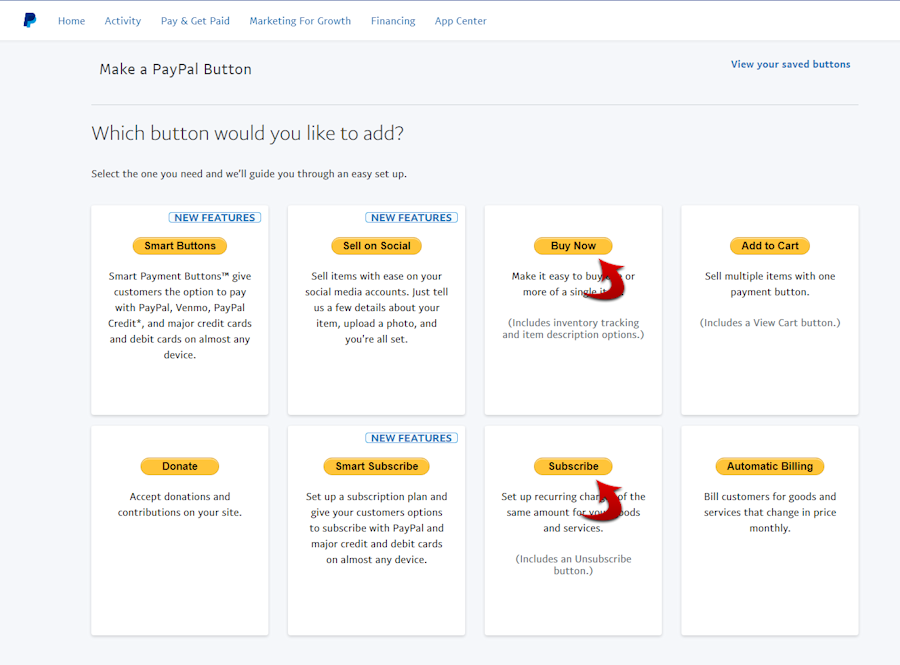
For a single payment buy now button select Buy Now from the grid of choices. On this same page, select Subscribe for a subscription (multi-payment) button. Select only one and complete the full process through to generating the code for that type of button before proceeding with the other button type.
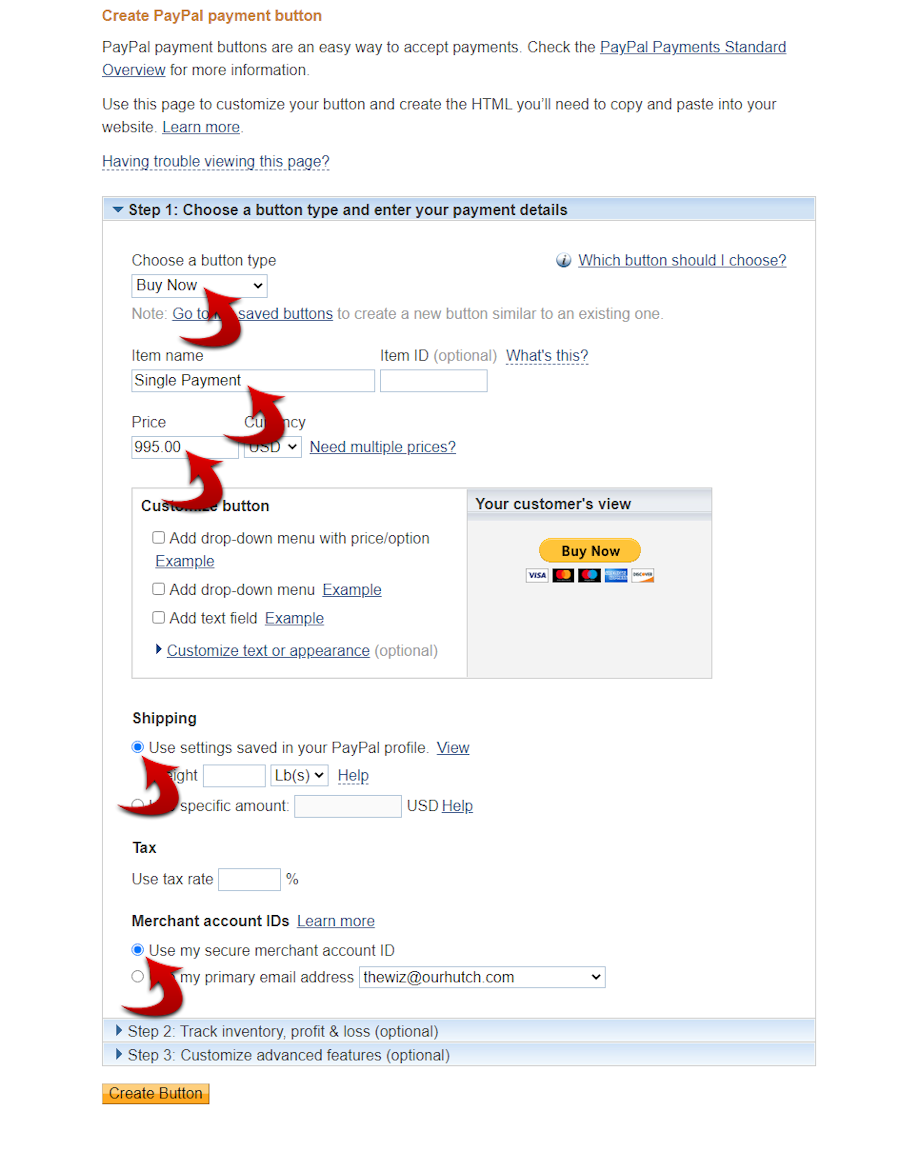
On the Create PayPal payment button page, in the Step 1: Choose a button type and enter your payment details section, be sure Buy Now is selected for button type. Enter a name for your button, Single Payment in this example. Enter the amount to be charged. Shipping and Merchant account IDs should be selected as shown.
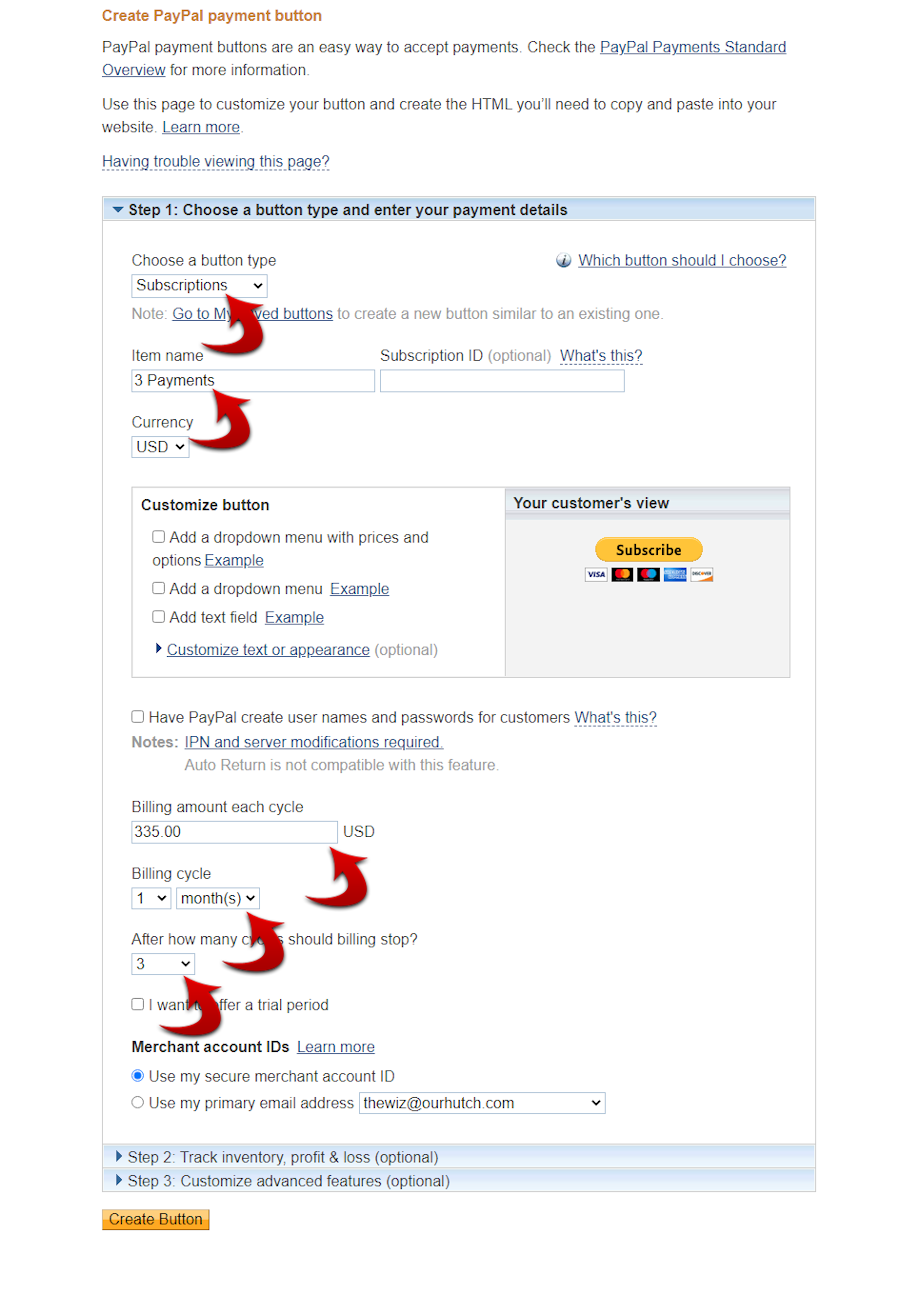
For the subscription (muli-payment) button, only the Step 1: Choose a button type and enter your payment details section is different. The rest is the same for both buttons. Be sure Choose a button type is set to Subscriptions. Enter a suitable button name. Enter the Billing amount each cycle (amount of each payment), the duration of the cycle (as in 1 month), and the number of payments that will be received.
Select Step 2: Track inventory, profit & loss (optional) and ensure that Save button at PayPal is unchecked.

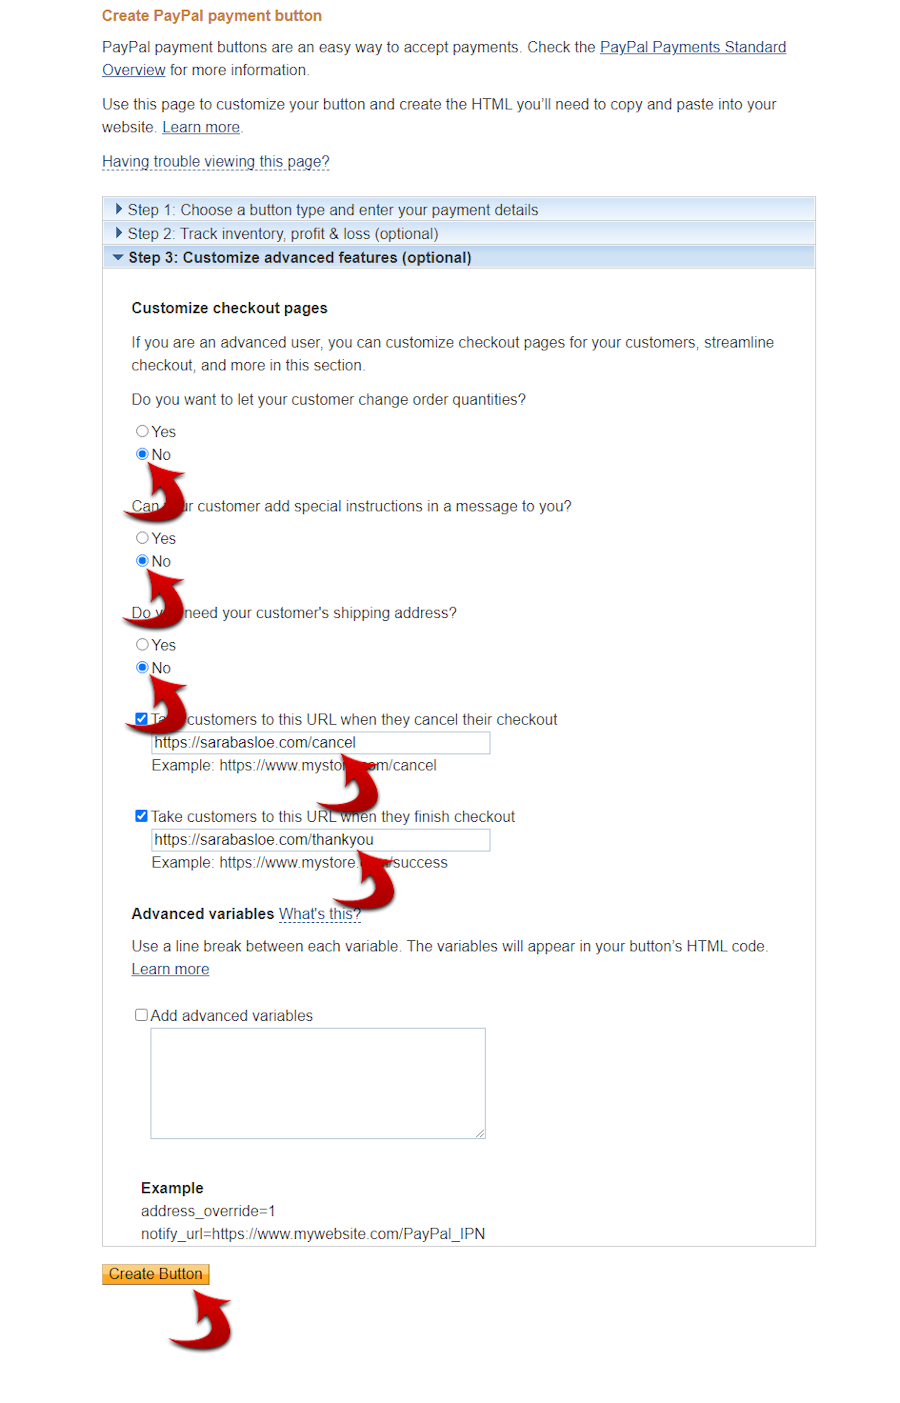
Select Step 3: Customize advanced features (optional) and ensure the first 3 items are set to No. Enter the URLs for return pages as shown. Click Create Button.
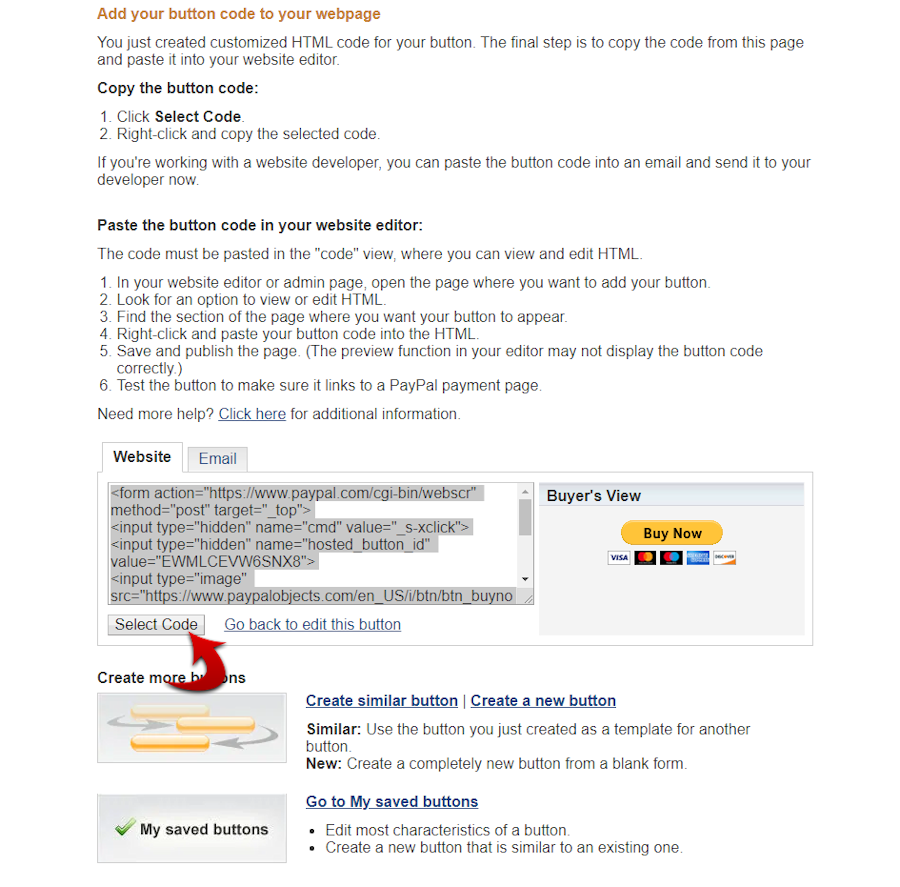
Under the Website tab, click the Select Code button which will highlight the code text. Copy (CTRL-C) this code and send to me by email ([email protected]).
Complete this process for each button type needed. That's all there is too it.